What Is a Referral Website?
A referral website involves is a blog or site that uses referral marketing tactics. The site only makes money if the person that your supporters refer them to makes a purchase. As a result, the referrer makes money as well. This is a good way to build a more organic approach to things, because it comes from a personal perspective.
Why Have a Referral Website?
A referral site can help create a great edge. It’s one of the best ways to get a beginner or intermediate business and take it to the next level. Also, it’s much easier to do this, because you have like-minded people that can help you find others willing to support your cause. This type of synergy makes your brand have more staying power in the long-run.
How Companies Can Improve By Having a Referral Website
Your company improves by finding the core audience and being able to appeal to it much better. They aren’t just looking to give people wage they want and need. Rather, the people that sign up for the referral site have already found that this brand is something that represents them. From the start, this separates the brand from other sites out on the market. If you are using Stripe you can also setup a stripe affiliate program and give recurring commissions.
Here’s how you can setup your website:
Step 1: Choose Your Affiliate Software and Log In
Developing a referral program takes some work, but finding a good software makes it worthwhile. OSI Affiliate Software is a solid choice to keep everything organized. Fill out the details in the login of your admin section.
Get ready to set up your software.
Step 2: Software Set Up

Now, select the option In the dashboard that says “Get Thank You Page Code.”
Step 3: Choose Get Thank You Page Code
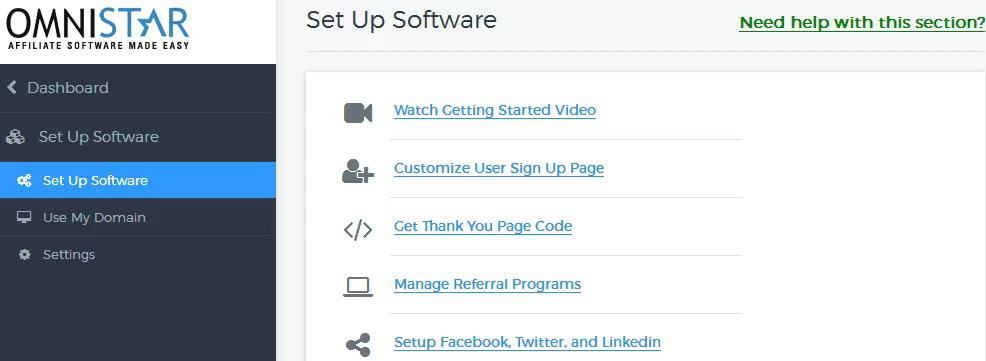
You’ll be able to select some choices at the drop down list portion when you head to “Get Thank You Page Code.”
Step 4: Pick the Right Shopping Cart

For starters, you can select a good shopping cart to go with your site. Something like Shopify would be great for helping you run your ecommerce store.
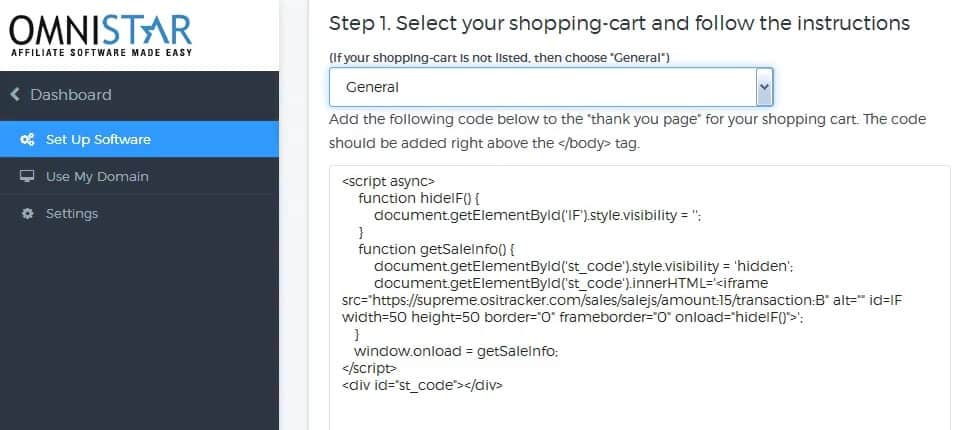
Here’s where you can only take a few moments to do the integration process. All you have to do is copy the code and paste it. Look the details of the image above and follow the directions in Step 1:
To integrate sale tracking with Shopify, you should do the following steps.
- Login to your Shopify admin panel.
- Now to add the sales tracking code, click the “Settings” link on the left navigation and then click “Checkout”
- Now scroll down and Go to the “Additional Content & Scripts” section and copy & paste the following code.
Here’s the code:
<script>
function hideIF() {
document.getElementById(‘IF’).style.display = ‘none’;
}
function getSaleInfo() {
document.getElementById(‘st_code’).innerHTML='<iframe src=”https://supreme.ositracker.com/sales/salejs/amount:{{subtotal_price|money_without_currency}}/transaction:{{order.order_number}}/Email:Add_Email/PromoCode:{{order.discounts[0].code}}” alt=”” id=IF width=50 height=50 border=”0″ frameborder=”0″ onload=”hideIF()”>’;
}
window.onload = getSaleInfo;
</script>
<div id=”st_code”></div>
You can always get more if needed by selecting general option.
Step 5: Choose General Option
Here’s the main code:
Add the following code below to the “thank you page” for your shopping cart. The code should be added right above the </body> tag.
<script async>
function hideIF() {
document.getElementById(‘IF’).style.visibility = ”;
}
function getSaleInfo() {
document.getElementById(‘st_code’).style.visibility = ‘hidden’;
document.getElementById(‘st_code’).innerHTML='<iframe src=”https://supreme.ositracker.com/sales/salejs/amount:15/transaction:B” alt=”” id=IF width=50 height=50 border=”0″ frameborder=”0″ onload=”hideIF()”>’;
}
window.onload = getSaleInfo;
</script>
<div id=”st_code”></div>
Transaction = should be populated with the transaction id or order id for this order.
Amount = should be populated with the amount for this order.
If you don’t want to do everything by yourself, the staff is more willing to get this process underway for free. Talk to someone on the staff about your plans to help build the software.
Step 6: Submit a Ticket for Free Help Request
Now, you can go to the bottom of the dashboard and choose free one on one help. Request Free Setup. Once, you’re able to submit the ticket, it’ll make it easier to help get your referral software onboard.

Step 7: Add Link to the Affiliate Sign Up Page
Click sign up page
Go to the link where the sign up is located.
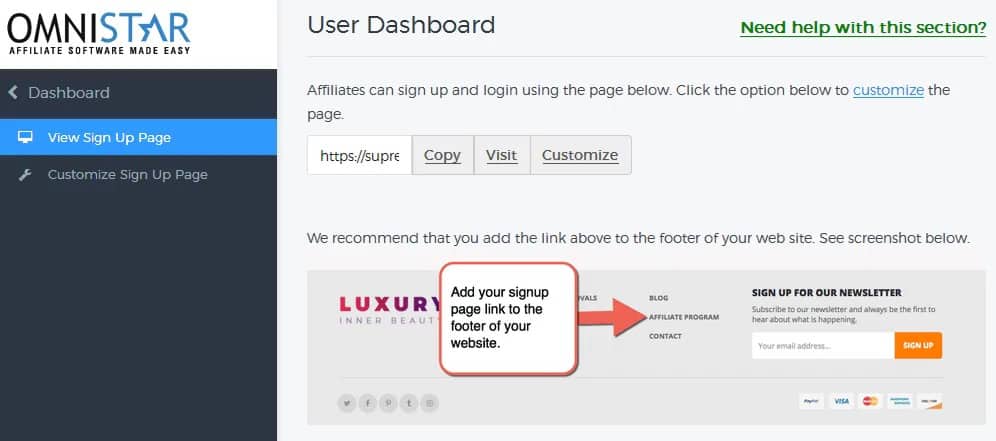
In case you wanted to get a preview to see if it matches to your satisfaction, go to the visit button.
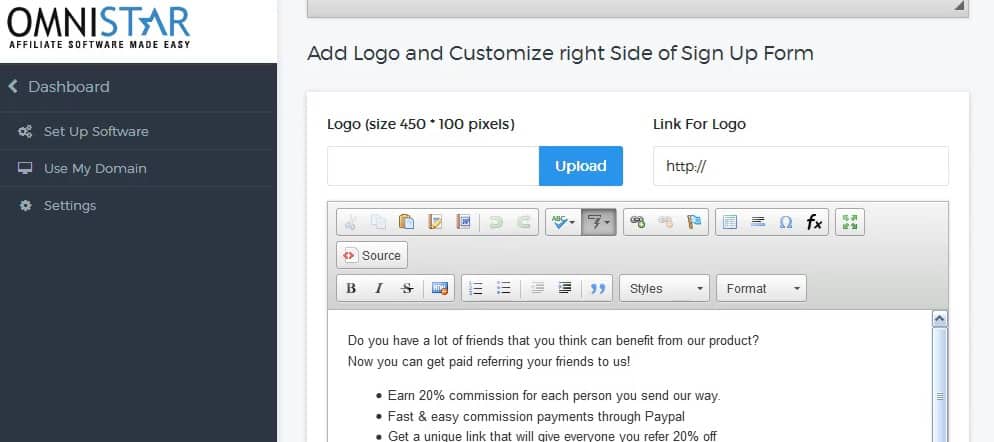
You can make changes to the logo and anything else you see fit. Customize everything to your liking.
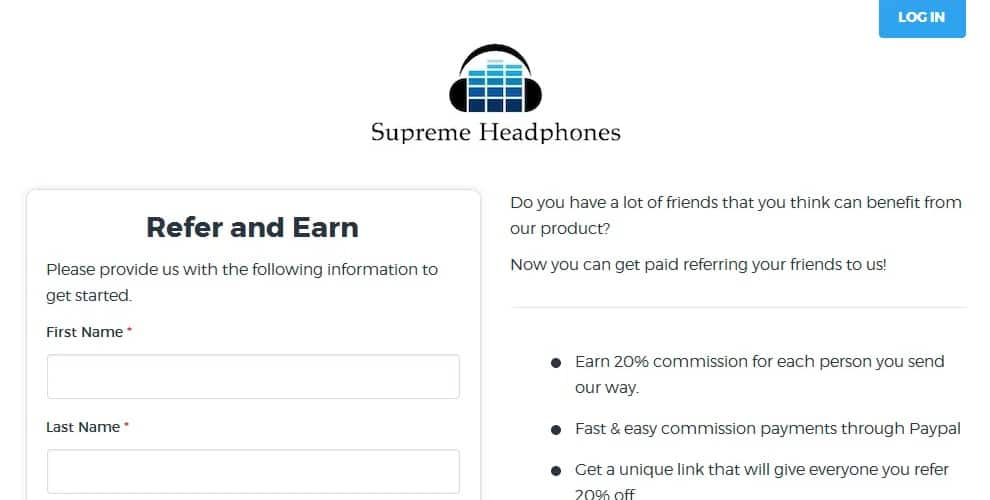
Enter in the text description. Also, you can see whether a left or right text alignment would work best. Add in your unique logo to help you make your brand stand out more. Fill out the commission information and everything else on the backend.
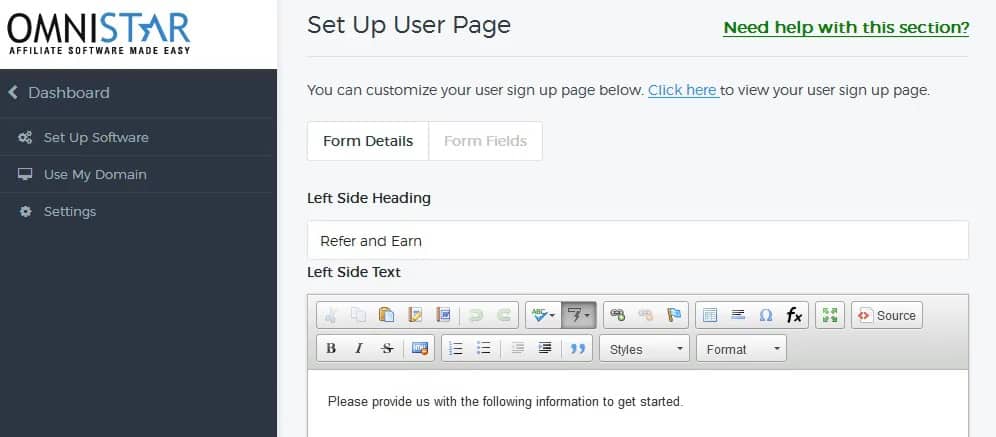
Step 8: Customize the Form Fields
There’s a number of registration fields to choose. Keep it simple with a few options or go to the edit button to make it more complex.
Also, preview everything before proceeding.
Now, everything is good to go, and you can test your store before it’s fully ready to launch.
It’s very seldom for informative to be a light read, this is a good work.
Nice, filled with great information.
This is great, It’s been a while since I’ve last read original content from the internet.
You are very helpful, your articles are really great.
Your articles are well written.
Well written!
Not just well written but well explained too! I’m not very techy but these posts has really helped.